Create and edit categorization rules
A rule categorizes a vendor or bank text the same way every time. Create one on the Rules tab, preview what it changes, and apply it to past transactions if you want.
Steps
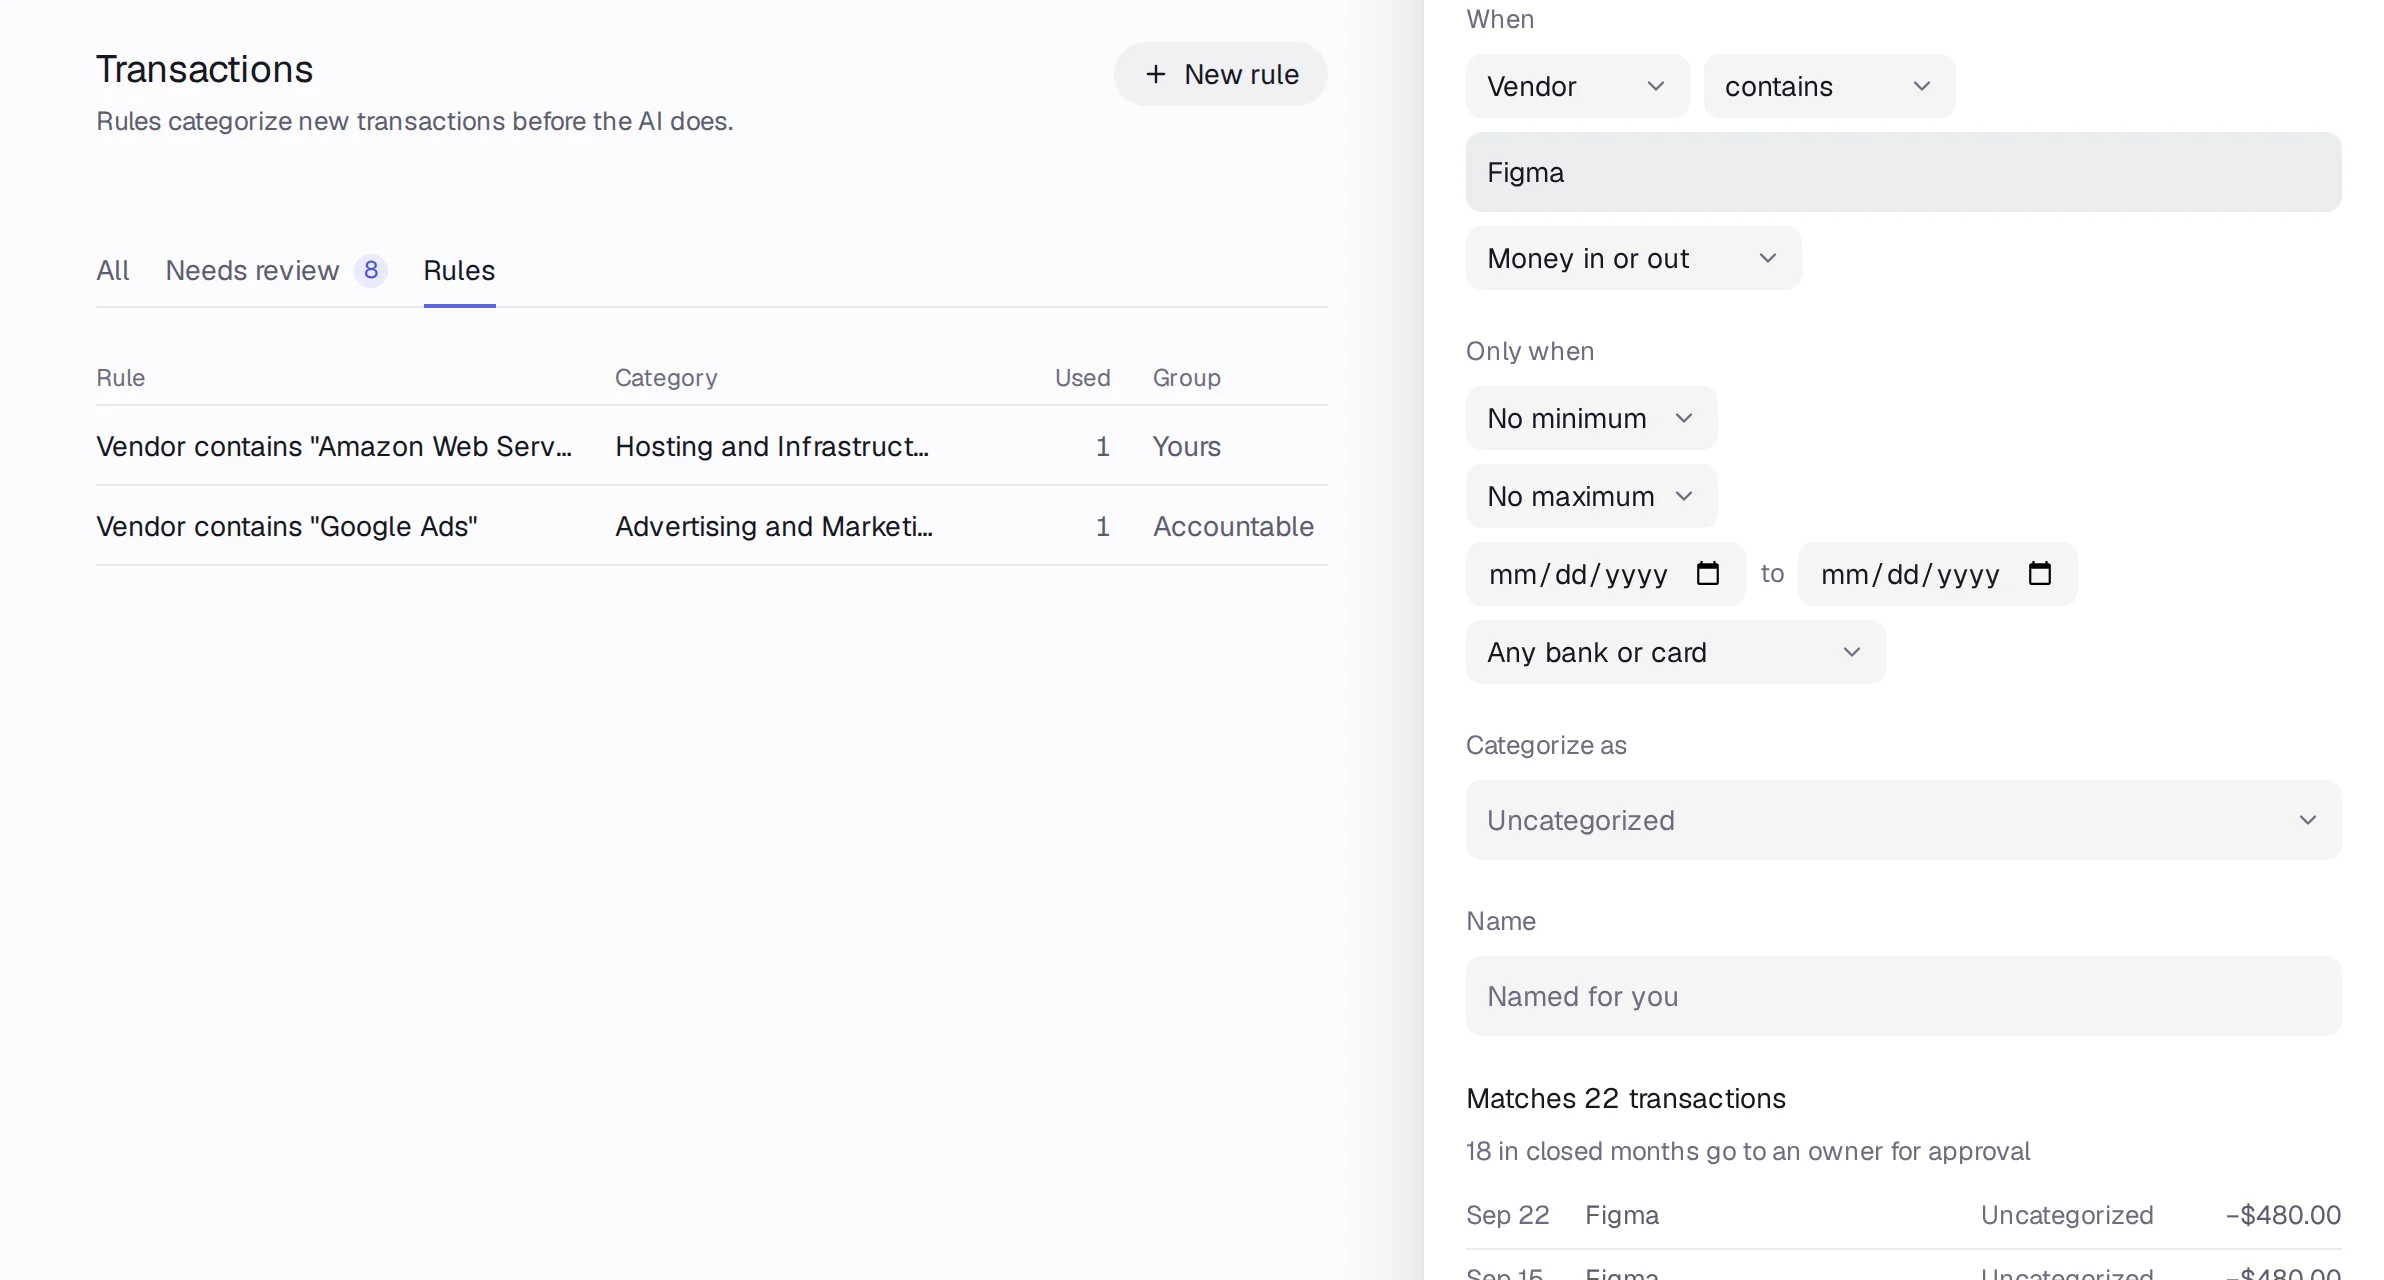
Step 1: Open Transactions and pick the Rules tab (or Settings › Categorization rules). Press New rule.
Step 2: Under When, pick Vendor or Bank text, then contains, is or starts with, and type the text, like Figma.
Step 3: Pick Money in or out, Money out only or Money in only. Add amounts, dates or one account under Only when if you need them.
Step 4: Pick the account under Categorize as and give the rule a Name.
Step 5: Read the preview: Matches N transactions and how many would change. Leave Also change past transactions ticked to fix old ones too.
Step 6: Press Create rule.
Edit or delete a rule
Step 1: Click the rule on the Rules tab.
Step 2: Change it and press Save rule, or press Apply to N past transactions.
Step 3: To remove it, press Delete. Transactions it already categorized keep their category.
Good to know
- Rules marked Accountable came with the product or your move; rules marked Yours are the ones you made.
- Past transactions in closed months wait for an owner: press Send N in closed months for approval.